English
 简体中文
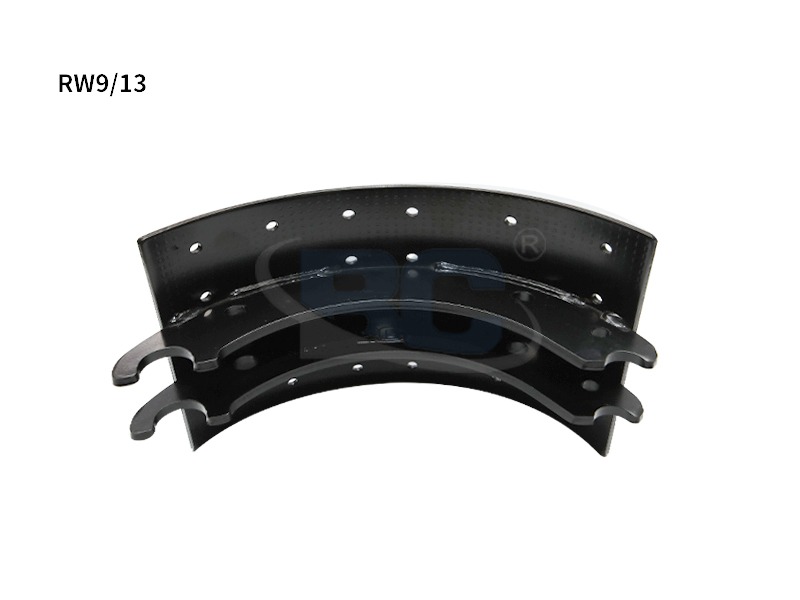
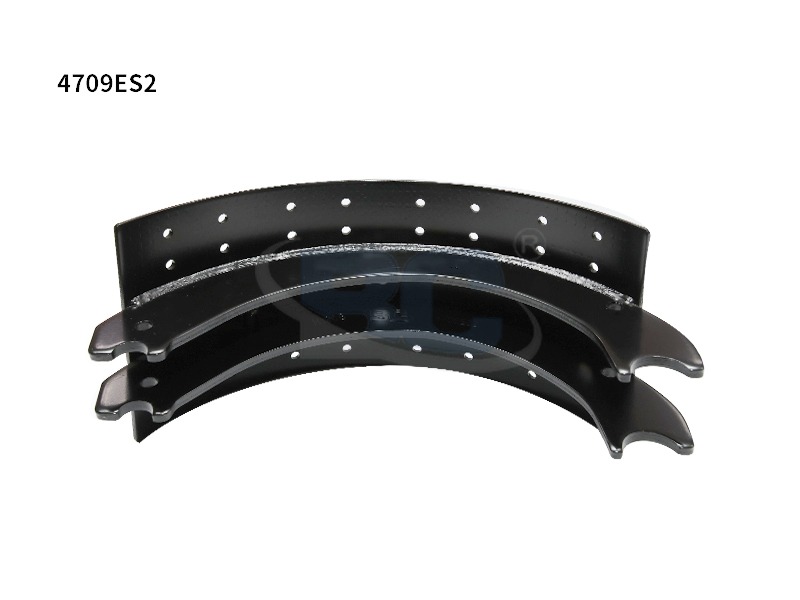
简体中文The RW9/13 Brake Shoe is a heavy-duty steel brake shoe engineered for trailer axle braking systems, commonly specified on commercial semi-trailers, agricultural trailers, and construction plant equipment using S-cam drum brake configurations. The direct conclusion: if your trailer axle calls for an RW9/13 shoe, it is a safety-critical component that must meet exact dimensional, material, and friction specifications — substitution with an incorrect part is not acceptable practice.
What the RW9/13 Designation Means
The RW9/13 code is a dimensional and application classification used widely in the European trailer brake parts market. Breaking it down:
| Code Element | Meaning | Practical Significance |
|---|---|---|
| RW | Brake shoe series designation (rim width / web profile) | Defines the shoe table width and web geometry |
| 9 | Shoe table width in inches (9") | Must match drum width exactly — affects lining contact area |
| 13 | Drum diameter in inches (13") | Determines the arc radius of the shoe and lining |
This means the RW9/13 Brake Shoe is designed for a 9-inch wide, 13-inch diameter drum brake assembly. These dimensions are not nominal — a shoe ground to the wrong radius will contact the drum only at the edges or centre, reducing effective braking force by 30–60% and causing rapid, uneven lining wear. Always verify drum diameter with a calliper before fitting replacement shoes.
Key Specifications and Construction
Understanding the construction of an RW9/13 shoe helps you evaluate quality across suppliers and identify substandard parts before they reach the axle.
| Specification | Standard Requirement | Why It Matters |
|---|---|---|
| Shoe Table Material | Low-alloy structural steel, minimum 4 mm thickness | Resists flexion under high brake torque; prevents lining detachment |
| Web Material | Pressed or rolled steel, 6–8 mm typical | Carries axle and cam loads; failure here causes catastrophic brake loss |
| Arc Radius | Precisely ground to 6.5" (half of 13" drum) | Ensures full-face lining contact — critical for rated braking performance |
| Roller / Pivot Bore | To OEM specification; typically 25–28 mm | Sloppy bore causes brake lag and uneven actuation |
| Surface Treatment | Electrophoretic coat (e-coat) or powder coat | Prevents corrosion of the steel table between lining replacements |
| Lining Rivet Holes | Pattern matched to standard lining sets | Ensures correct lining fitment; off-pattern holes require custom linings |
High-quality RW9/13 shoes are manufactured using precision pressing and CNC-ground shoe tables. The table arc should be verified with a radius gauge — a tolerance of +0/-0.2 mm is acceptable for full lining contact. Shoes outside this tolerance will require drum-to-shoe bedding that takes significantly longer, during which braking performance is compromised.
Compatible Axles and Trailer Applications
The RW9/13 shoe is associated with a specific range of axle makes and trailer types. Knowing the compatibility list avoids costly mis-ordering:
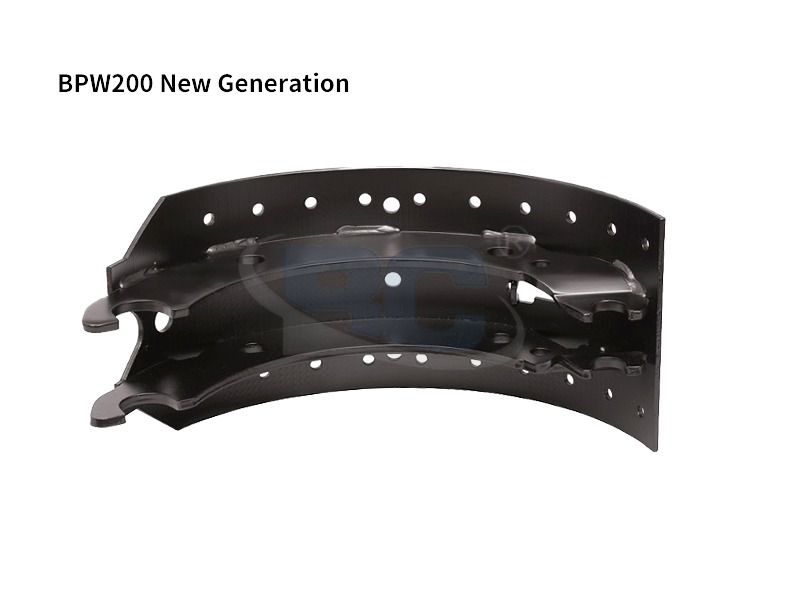
- BPW ECO Plus and standard trailer axles — The RW9/13 profile is widely used across BPW's European semi-trailer axle range, particularly on axles rated between 9,000 kg and 12,000 kg per axle.
- SAF-Holland INTRA axle series — Several SAF trailer axles use the 9 x 13 drum brake geometry; cross-reference the axle part number to confirm shoe specification before ordering.
- Knott and AL-KO agricultural trailer axles — Larger capacity agricultural trailers with 13-inch drum systems frequently use the RW9/13 profile.
- Fruehauf and Schmitz semi-trailer original fitment — Many European curtainsider and flatbed trailers built in the 1990s through 2010s left the factory with 9 x 13 drum brakes as standard equipment.
- Tipper and construction trailers — Due to the higher abuse loads in tipping applications, the robustness of the 9 x 13 drum shoe specification has maintained its specification in this sector longer than in general freight trailers.
Always cross-reference with the axle manufacturer's brake specification plate, which is typically stamped on the axle beam or attached as a data plate near the brake spider. The plate will confirm drum diameter, shoe width, and maximum lining thickness — the three values needed to confirm RW9/13 compatibility.
Friction Lining Selection for the RW9/13 Shoe
The brake shoe itself is the steel carrier — the friction lining bonded or riveted to it is what actually generates braking force. Lining specification for the RW9/13 application must be matched to the operational duty cycle:
| Lining Grade | Friction Coefficient | Best Application | Typical Service Life |
|---|---|---|---|
| Standard Commercial (e.g. Ferodo 3434) | 0.38–0.42 mu | General freight semi-trailers, motorway work | 200,000–300,000 km |
| High-Friction (e.g. Don 19) | 0.43–0.48 mu | Urban distribution, frequent stop-start cycles | 120,000–180,000 km |
| Heavy-Duty / High-Temp | 0.40–0.44 mu | Tipper, quarry, downhill mountain routes | 80,000–150,000 km depending on severity |
| Agricultural Grade | 0.35–0.40 mu | Low-speed, high-load farm trailer applications | Varies — condition-based replacement typical |
For European commercial trailers, linings fitted to the RW9/13 shoe must comply with ECE R90 approval — this is a legal requirement in most EU markets for replacement brake linings on vehicles over 3,500 kg GVW. Non-approved linings may perform adequately in normal conditions but expose the operator to significant liability in the event of a brake-related incident.
New lining thickness on the RW9/13 application is typically 18–21 mm. EU roadworthiness inspection limits typically require lining replacement when thickness reaches 3–5 mm above the rivet head (riveted) or 2 mm absolute minimum (bonded). Do not allow linings to wear to the shoe table — scoring a 13-inch drum on a commercial trailer axle adds $150–$400 per drum in additional repair costs.
Installation: What Correct Fitting of an RW9/13 Shoe Requires
Fitting a replacement RW9/13 Brake Shoe is a straightforward task for a qualified trailer mechanic, but each step must be followed precisely to ensure the brake performs to its rated specification.
Pre-Installation Checks
- Measure drum internal diameter with a drum calliper — maximum drum wear diameter is stamped on the drum face; drums beyond this limit must be replaced regardless of visual appearance
- Inspect the brake spider (backplate) for cracks, distortion, or worn cam bore — a worn cam bore introduces play that causes inconsistent brake application
- Check the S-cam shaft for wear on the splines and at the bush journals — side play exceeding 0.5 mm at the cam tip indicates bush replacement is required
- Inspect the roller and anchor pin bores on the old shoes — measure diameter and compare to new shoe specification; these are high-wear points that directly affect shoe return travel
Fitting Procedure
- Clean all shoe contact surfaces on the spider with a wire brush — paint and debris build-up on the shoe platforms causes shoes to stick rather than return cleanly after brake release
- Apply a very light smear of high-temperature copper-free brake grease to the shoe table pivot points and anchor pin only — never apply grease to the drum contact surface or lining
- Fit both shoes to the axle simultaneously — one shoe holds while the other is compressed; always replace both shoes on an axle end as a pair to maintain balanced braking
- Refit the drum and check that it rotates freely with less than 0.3 mm of radial runout — a drum that drags after correct shoe fitting indicates a scored or out-of-round drum
- Adjust the slack adjuster to achieve the correct pushrod stroke — automatic slack adjusters should set to 45–55 mm application stroke; manual adjusters require setting to within 5 mm of this range
- Bed-in the new shoes with 10–15 moderate brake applications from 40 km/h to 10 km/h before full-load use — this brings the lining arc into full contact with the drum and stabilises the friction coefficient
Post-Fit Inspection Checklist
- Pushrod stroke within specification at 0.7 bar application pressure
- Drum temperature balanced across all axle positions after a test run (all brakes working; a cold drum indicates a non-functioning brake)
- No brake drag when released — drum should be touchable within 5 minutes of moderate braking
- No audible grinding, squealing, or rhythmic thumping — these indicate contaminated linings, out-of-round drums, or loose hardware
Common Failure Modes and How to Avoid Them
| Failure Mode | Root Cause | Prevention |
|---|---|---|
| Lining delamination from shoe table | Corrosion on shoe table surface under lining; heat cycling with moisture ingress | Use e-coated or hot-dip galvanized shoes; replace at first sign of edge lifting |
| Shoe table fatigue crack | Repeated overloading; incorrect material grade in shoe manufacture | Source from verified OEM-equivalent manufacturers; inspect shoes at each lining change |
| Rapid and uneven lining wear | Incorrect shoe arc radius; bent shoe table from previous impact | Radius-check new shoes before fitting; never reuse bent shoes |
| Brake pull to one side | Mismatched lining grades across axle; one shoe not returning | Always fit matched pairs; clean and lubricate spider platforms at each service |
| Drum scoring from shoe contact | Worn lining through to rivet heads; lining fragments in drum | Inspect lining thickness at every vehicle inspection; do not defer replacement |
Purchasing Guide: What to Confirm Before Ordering
When sourcing replacement RW9/13 shoes, the following information eliminates misorders and compatibility issues:
- Confirm drum diameter and width from the axle data plate — do not rely on vehicle age or fleet assumption; drum specifications have changed across production runs of the same trailer model
- Specify shoe supplied with or without lining — bare shoes allow you to source preferred lining grades separately; pre-lined shoes are faster to fit but limit lining choice
- Ask for the rivet hole pattern drawing or confirm against your existing lining set — mismatched patterns require new lining drilling, adding labour cost and potentially weakening lining integrity
- Verify the supplier's quality certification — shoes for commercial vehicle use should be manufactured under ISO 9001 quality management as a minimum; TS16949 or IATF 16949 certification indicates automotive-grade process control
- Check surface treatment specification — bare bright steel shoes will rust during storage and in service; this is not a cosmetic issue — corrosion on the shoe table lifts linings within 12–24 months in wet operating environments
- Order as axle sets (minimum two shoes per axle end) — single shoe replacement is not best practice and is flagged in most commercial vehicle maintenance standards as non-compliant